That blinking “ready” light on your Keurig? It’s hiding more power than you think.
Learning to use a Keurig coffee maker isn’t just about pushing buttons; it’s about hacking your way to coffee shop quality without leaving your kitchen.
From bleary-eyed parents to CEOs running on espresso, these machines have rewritten caffeine rules. You may be wrestling with packaging tape on a brand-new model.
Or perhaps your trusty Keurig’s lost its mojo. Either way, we’re cracking the code: setup tricks baristas won’t tell you, brewing hacks for a richer flavor, and the maintenance rituals that keep machines humming for years.
By the time you finish reading, you’ll know why your neighbor’s Keurig coffee tastes better, how to fix weak brews forever, and the one mistake 90% of owners make with water temperatures.

Safety and Setup
Plugging in your Keurig isn’t rocket science, but do it wrong, and you’ll regret it. Always use a three-prong outlet (those weird slots in your wall).
No cheating with extension cords. Give your machine breathing room, 24 inches on all sides. Coffee makers hate cramped spaces more than you hate Monday mornings.

That power cord? Treat it like a snake. Keep it far from hot surfaces and water puddles. Now, let’s meet your machine’s VIP parts.
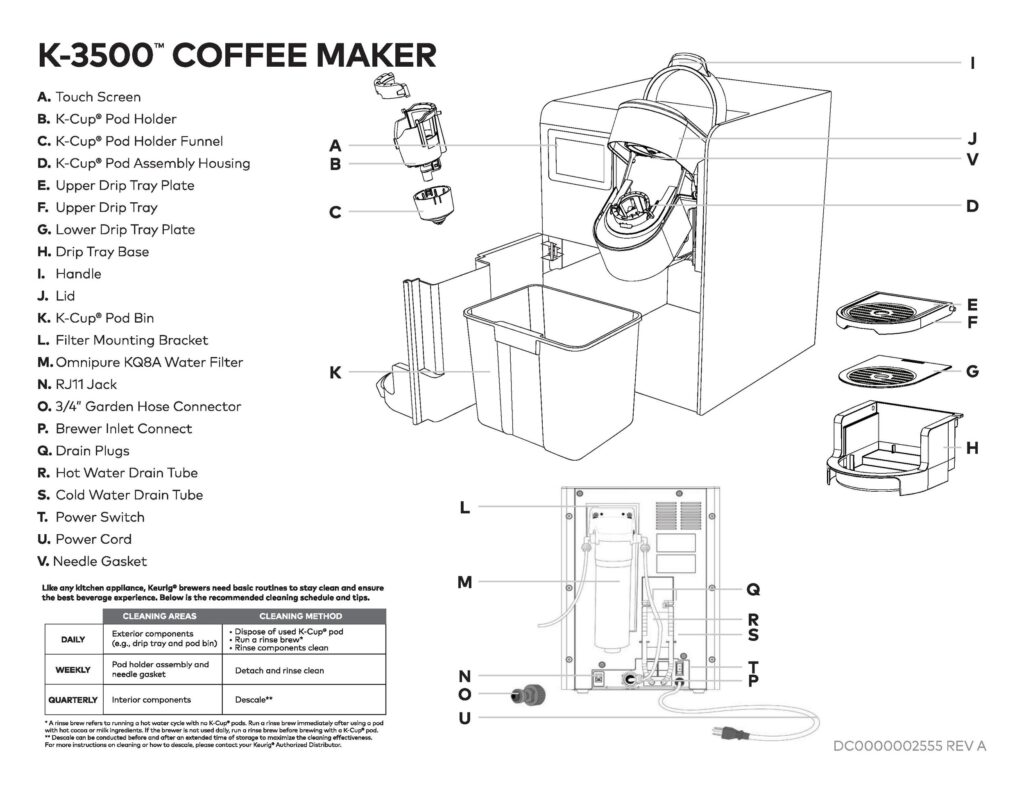
The giant water tank (60-75oz) is your Keurig’s thirst quencher. The slidey drip tray? It moonwalks up and down to fit giant Yeti mugs.
Those sharp needles inside? They’re your K-Cup assassins, piercing foil lids like butter.
Grab these four tools now: a paperclip (yes, really), soft cloth, descaling liquid, and water test strips. You’ll need them later. Trust me.
First setup ritual: Rip off every plastic film, even the ones you don’t see. Fill the tank to MAX with filtered water (distilled water is a no-go; it’s like feeding your Keurig cardboard).
Hit the power button. That red light? It’s your machine screaming, “I’m alive!” Could you wait until it blinks blue? Now you’re cooking.
Pro tip: Distilled water lacks the minerals your Keurig needs. Use filtered or spring water instead. Your machine will reward you with better coffee.
How to use a Keurig coffee maker: Getting Started with Your Keurig
Your Keurig isn’t just another appliance; it’s your barista. Let’s break down its DNA. The water reservoir? That’s its bloodstream.
The drip tray? A shape-shifting platform for mugs. The K-Cup holder? The heart is where magic happens. The control panel? Your mission control.
Find a flat, sturdy surface near an outlet with no wobbly tables. Countertop real estate matters.
Unbox like you’re defusing a bomb: remove every foam piece, sticker, and plastic film. Miss one, and you’ll smell burning plastic later.
Here’s the ritual new owners skip: The virgin brew. Fill the reservoir to MAX (filtered water only; tap water’s minerals are murder here).
Power on. That red light means it’s heating like a coffee dragon waking up. When it blinks blue, don’t brew yet.
Run a water-only cycle without a pod. Why? Machines have factory dust and oils. This “cleansing brew” flushes out the gunk.
Catch that water in a mug you hate; it’ll smell like robot sweat. Toss it. Now your machine’s baptized and ready.
Secret move: During setup, test the drip tray’s height. Slide it down for espresso cups and up for giant tumblers.
Heard that “click”? That’s your Keurig saying, “I’ve got your back.”
Basic Brewing Steps

K-Cups aren’t created equal, that pumpkin spice pod from 2022? Toss it. Freshness rules here. Check expiration dates like you’re buying milk.
Store pods away from stoves and windows; heat and light turn good coffee stale faster than bread in the rain. Wonder how long do coffee pods last? Not forever.
Your Keurig model has a type; some flirt with K-Carafe pods, and others only date K-Cups. Check your machine’s manual (or the underside) for compatibility.
Using the wrong pod is like forcing a USB sideways; it won’t end well.
Now, cup sizes, your secret flavor dial. That 4oz setting? It’s your espresso impersonator, blasting hot water through the grounds like a firehose.
6oz is diner coffee, balanced and reliable. 8oz glasses of water things down for lighter roasts. 10oz? This is for when you need liquid courage in a soup bowl.
12oz is trucker fuel, filling travel mugs to the brim.Golden rule: Smaller cups = more potent brew. That 4oz setting extracts more flavor oils from the same pod.
Found a weak K-Cup? Brew it at 6oz instead of 8oz. Taste like bitter tar?
Go bigger next time. Your machine’s buttons are training wheels; you’ll tweak sizes like a coffee sommelier once you crack this code.
Keurig optimal temperature guide
| Beverage Type | Temperature | Best For |
| COFFEE | ||
| Regular Coffee | 192°F | Awakens medium roasts without scalding; think morning blends that taste like sunlight |
| Dark Roast | 187-189°F | Tames bitter notes in French roast coffee, like lowering flames under burnt toast |
| Light Roast | 190-192°F | Extracts delicate floral notes from blonde roasts; gentle heat coaxes out hidden flavors |
| TEA | ||
| Black Tea | 190°F | Unlocks tannins in Earl Grey without turning it leathery |
| Green Tea | 185°F | Protects sencha/matcha from bitterness, steep hotter and you’ll murder the zen |
| Herbal Tea | 208°F | Blasts chamomile/mint leaves to release oils; these tough herbs need a sauna |
| SPECIALTY | ||
| Hot Cocoa | 187°F | Melts powder smoothly without scorching, like tempering chocolate |
| Travel Mug | 192°F | Fights heat loss through insulated walls; your coffee stays lava-hot for 90 minutes |
| Iced Drinks | 192°F | Brews concentrate strong enough to survive ice melt, no watery disappointment. And yes, iced coffee does have caffeine |
Range: 185°F (green tea’s safe zone) to 208°F (herbal tea’s boot camp)
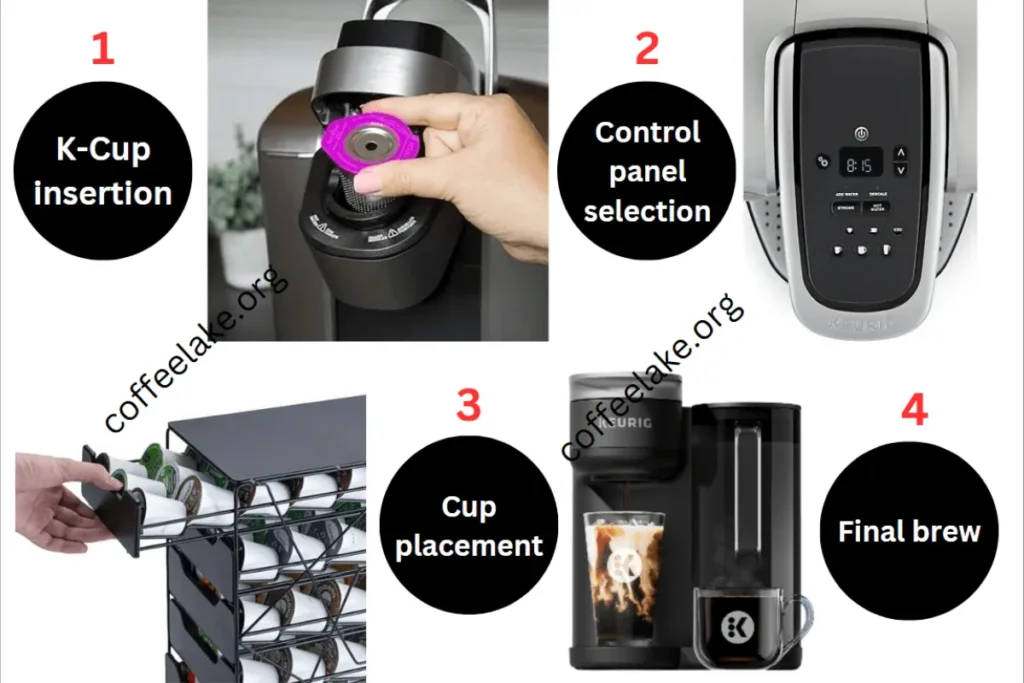
Now, the brewing ballet:
- Water first, always fresh, never yesterday’s leftovers.
- Wait for blue; that light’s your Keurig saying, “I’m ready, coach.”
- Mug placement matters; center it or face splash disasters.
- K-Cup insertion, foil up, like inserting a DVD. Hear that click? That’s the needle doing a perfect piercing.
- Lid lockdown, slam it shut like closing a suitcase. Half-shut lids brew weak coffee and hurt your machine’s feelings.
- In the size selection race, you’ve got 60 seconds before the machine forgets.
- Listen closely; when gurgling stops, your brew’s done. Wait 30 seconds before round two.
Danger zones:
- Peeking mid-brew? That’s how you wear coffee as cologne.
- Steam jets can brand skin and treat the machine like a tiny dragon. Not ideal if you’ve just had dental work done.
- Yanking the reservoir mid-heat? That’s like removing your car’s gas tank while driving.
Models vary by ±5°F. Check your manual’s specs; some Keurigs let you tweak temps degree by degree.
Found a perfect setting? Write it on your machine with a dry-erase marker.
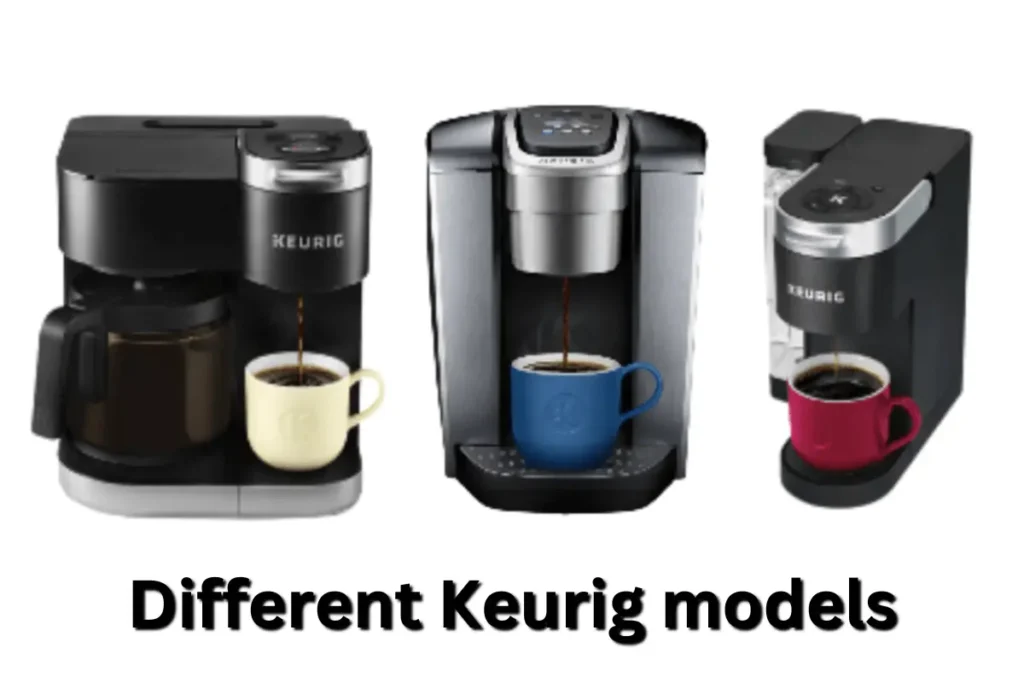
Keurig Model Compatibility Chart
| Model Series | K-Cup | K-Carafe | K-Mug | My K-Cup | Temperature Control |
| K-Classic | ✓ | ✗ | ✗ | ✓ | ✗ |
| K-Elite | ✓ | ✗ | ✓ | ✓ | ✓ |
| K-Supreme | ✓ | ✗ | ✓ | ✓ | ✓ |
| K-Duo | ✓ | ✓ | ✓ | ✓ | ✓ |
| K-Mini | ✓ | ✗ | ✗ | ✓ | ✗ |
| K-Cafe | ✓ | ✗ | ✓ | ✓ | ✓ |
Special Features:
- K-Elite: Iced coffee button (brew strength survives ice melt), instant hot water for oatmeal emergencies
- K-Supreme: MultiStream tech showers coffee grounds evenly like a rainstorm, extracting hidden flavors from blonde coffee, which has more caffeine
- K-Duo: The overachiever, brews single cups and full carafes (12 cups) for family chaos mornings
- K-Cafe: Built-in milk frother turns pods into lattes that’ll shame Starbucks
Here’s the deal: Checkmarks mean “yes,” and Xs mean “don’t even try.” The K-Classic? It’s your basic buddy, great for K-Cups and reusable filters, but forget fancy temps or travel mugs.
The K-Duo? It’s the Swiss Army knife, compatible with everything, including carafe pods for when you need a caffeine IV drip.
Found an X in your machine’s column? Forcing the wrong pod jams needles faster than a toddler shoving Legos in a DVD player.
Using a K-Mug pod in a K-Classic won’t just fail; it could void your warranty. The K-Cafe’s frother? It’s why that $8 latte habit died.
And that K-Supreme’s MultiStream? It’s why your neighbor’s coffee tastes 20% better; water hits grounds from five angles instead of one.
Advanced Brewing Features
That “Strong” button isn’t just for show; it’s your ticket to bolder mornings.
When activated, your Keurig becomes a slow-drip maestro, stretching water flow by 30% to wring every last flavor molecule from the grounds.
Dark roast lovers, this is your espresso cheat code.
Flip to “Iced” mode when summer hits. This clever setting brews a concentrated blast that laughs at melting ice cubes.
Your cold brew stays strong while lesser iced coffees turn into brown water. Pro tip: Use dark roast pods here; they survive dilution better than light roasts.
Night owls, meet your secret weapon: Auto-brew programming. Set it before bed like a coffee alarm clock.
Wake to freshly brewed magic without stumbling half-asleep to the machine. Just ensure the reservoir’s filled; there is nothing sadder than a Keurig gagging on air at 6 AM.
The hot water button? It’s not just for tea. Instant oatmeal, ramen emergencies, even sterilizing baby bottles (check your manual first).
But here’s the kicker: It bypasses the coffee path, so your next brew won’t taste like chicken noodles. This is how coffee urns work too.
Living in Denver or Mexico City? Engage in high-altitude mode. Above 5,000 feet, water boils cooler; this setting adds extra heat time to compensate.
Your coffee won’t know it’s brewing on a mountain. No different than Vietnamese coffee having more caffeine; environment matters.
Road warriors, the removable drip tray is your MVP. Slide it off to fit Yeti tumblers and giant latte cups. No more balancing acts or coffee puddles.
That 75oz reservoir? It’s the difference between refilling twice daily and hosting a coffee party without bathroom breaks.
Five temperature settings aren’t just numbers; they’re your flavor dials. Dark roast at 187°F becomes smooth chocolate.
Light roast at 192°F blooms with floral notes, especially Colombian coffee. Forget to adjust? The auto-shutoff (30 minutes to 2 hours) saves your butt when you dash out mid-brew.
Coffee rebel move: Combine features. Use “Strong” mode with a high-altitude setting for turbocharged brews.
Schedule auto-brew plus “Iced” mode for morning-ready cold coffee.
Maintenance and Care
Your Keurig’s not just a machine; it’s a high-maintenance friend. Treat it right, and it’ll outlive your last relationship.
Let’s break down the care ritual coffee snobs swear by.
Daily Love
Yank used K-Cups immediately; lingerers breed mold faster than bread in a rainforest. Is the drip tray half-full?
That’s your cue to rinse. Coffee residue here turns into concrete-like gunk. Wipe the spout daily with a damp cloth; those dried coffee droplets are flavor saboteurs.
Peek under the K-Cup holder; stray grounds lurk there like cockroaches.
Weekly Spa Day
Disassemble everything that comes off, including the tank, lid, drip tray, and K-Cup cradle. Soap bath for the reservoir (mild dish soap only, no bleach bullies).
Scrub the holder’s mesh screen with an old toothbrush. Check needles for glittery mineral deposits; a white crust means your water’s more complicated than a calculus exam.
Descaling: The Quarterly Reckoning
Empty the tank. Ditch the filter. The fun part is descaling the solution or mixing it with vinegar (50/50 with water). Fill to MAX.
Brew until the machine gasps. “Add Water.” Let it marinate for 30 minutes; this is where scale dissolves like bad decisions at a reunion.
Rinse like your life depends on it. Then, run 12 water-only cycles. Yes, twelve. Your nose will know when the vinegar’s gone.
Proper maintenance prevents black coffee from damaging your teeth.
Needle CPR
Unplug. Cool completely, hot needles stab. Remove the K-Cup holder. Straighten a paperclip. Gently poke the exit needle (bottom center).
Rotate like you’re picking a lock. Coffee silt will fall out like confetti. Reassemble. Run a water cycle. If it flows smoothly, you’ve just performed Keurig surgery.
Knowing how long to grind coffee beans helps prevent this clogging in the first place.
Filter Refresh
Every 60 days or 60 tanks, whichever comes first. Soak new filters for 5 minutes (they’re thirsty). Rinse for 60 seconds; no one wants carbon dust in their coffee.
Snap it into the reservoir’s handle. Twist the reminder dial to today’s date. In the future, you will send gratitude telepathically.
Pro Survival Tips
- Mold alert: Left water in the tank? Dump it. Stale water smells like a wet dog.
- Vinegar haters: Use a citric acid powder with the same descaling power and less odor.
- Forgotten grounds: They clog needles faster than TikTok ruins attention spans.
Neglect this routine, and your Keurig will punish you: weak coffee, error lights, and the works.
But stick to it; that machine will pump out perfect cups long after your smartphone dies.
Pro Tips for Better Coffee
Your tap water is the silent coffee killer. Filter it, not just for taste, but to save your machine from mineral heart attacks.
Think of water as coffee’s soulmate: 195-205°F is the “just right” zone. Too cold? Flavor stays trapped. Too hot? Bitter chaos ensues.
Some even wonder if coffee is vegan but water quality matters more for taste.
Distilled water is the zombie of H2O, lifeless and weird. Softened water? That’s saltwater in disguise. Both murder taste and clog your Keurig’s veins.
Store K-Cups like rare vinyl records in airtight containers in a cool pantry spot. Fridge storage is a rookie mistake; condensation turns pods into flavorless cardboard.
Grab water test strips; they’re litmus tests for coffee greatness. Ideal hardness? 4-6 grains (like beach sand, not sugar).
TDS meters should read 150-400 ppm; your filter’s ghosting its job outside that range. pH 6.5-7.5 is coffee’s happy place, more acidic than lemonade, less than soda.
If acidity concerns you, check if mushroom coffee is acidic.
The mug game matters. Preheat ceramics with a hot water rinse; for 30 seconds, keep coffee hotter than your phone after streaming.
Travel mugs? Yank the drip tray and crank the height to the max. Less splashing means more heat stays trapped, like a thermos hug for your brew.
Energy tricks: Set auto-off to 90 minutes if you’re forgetful. Night owl? Energy saver mode slashes power without losing settings.
Program morning brews 5 minutes before your alarm, wake to coffee ready to rumble, not lukewarm regret.
Troubleshooting Guide
Half-filled cups scream, “Help me!” Start with the basics: Is the water tank clicked properly? Misaligned reservoirs are like crooked gas caps; your Keurig panics.
Next, play surgeon: Unplug, cool down, then poke a paperclip into the exit needle (under the K-Cup holder). Coffee silt loves hiding there like socks in a dryer.
Blinking lights are Morse code for coffee lovers:
- Red flicker: “I’m still heating!” Wait 5 minutes. Still red? Your heating element’s on strike.
- Blue rave: “Descale me NOW.” It’s not a suggestion; it’s an intervention.
- Yellow flash: “Water, please.” Refill, then press brew like resetting a router.
Is the machine playing dead? Check two culprits: The tank is not seated (lift and slam it home), or the handle is not entirely down (close it like a car door).
Still silent? Unplug for 60 seconds, the Keurig version of CPR.
Advanced Warfare:
Inconsistent temps? Descaling’s your first call. Living in Denver or Bogotá? Engage in high-altitude mode; it’s not just for airplanes.
Grinding noises mean pump screen debris; find it behind the reservoir and clean it with a toothbrush.
Error messages are your machine’s final cry:
- “Add Water,” but the tank’s full? Check the float; sometimes, it sticks like a bad zipper.
- “Prime” error? Run three water-only cycles back-to-back. Think of it as burping your Keurig.
- “Descale” won’t quit? You skipped steps, redo the process, no shortcuts.
- “Heating” forever? Your thermostat might be ghosting you; it is time for support.
Warranty Jedi Moves:
Before calling Keurig support, document everything, dates, fixes, and error codes. Serial numbers live under the machine (flip it like a turtle).
The warranty covers factory flubs for a year, but they’ll blame you for neglect. Secret weapon? Email photos of the issue; support agents love visual evidence.
Pro Tip: Error codes starting with “E-“? Write them down immediately; they vanish faster than Wi-Fi during storms.
Keep a troubleshooting journal; it’s cheaper than a repair bill.
Frequently Asked Questions
Can I hack my Keurig to use regular coffee?
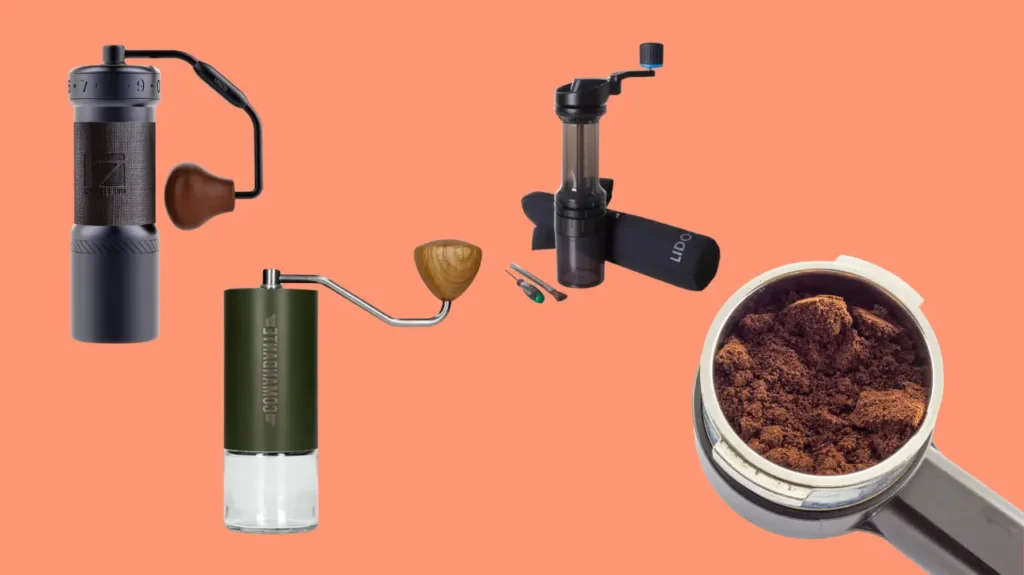
Grab a reusable My K-Cup filter. Scoop in 2-2.5 tablespoons of medium-ground coffee (avoid powdery espresso grinds; they’ll clog your machine like hair in a shower drain). Rinse the filter after each use, or yesterday’s coffee gunk will haunt your next brew. It’s cheaper to grind your own coffee, especially for this method.
Why does my coffee taste like sad water?
Three usual suspects: Clogged needles (clean ’em with a paperclip), a geriatric water filter (swap every 60 days), or mineral buildup (descaling is your savior). Also, brewing 12oz from a single pod? That’s like stretching one tea bag for a gallon; go smaller for gutsier flavor. Different from how decaf coffee tastes different; this is a brewing issue.
Can I rapid-fire brew multiple cups?
Patience, cowboy. Please wait 30 seconds between brews; your Keurig must catch its breath. Think of it like letting a microwave cool between reheating pizzas. Tank full? You’re golden. Tank empty? You’ll get error lights throwing shade.
Why’s my Keurig slower than DMV lines?
Scale buildup is the main villain; it narrows your machine’s pipes like cholesterol in arteries. High-altitude folks: Engage your machine’s mountain mode. Brew times should drop faster than your phone battery.
Tea and hot chocolate, yea or nay?
Go for it! Use official K-Cup pods for lattes or chai. Afterward, run a water-only cycle unless you want your coffee to taste like a candy store explosion. Pro tip: Hot chocolate pods work best at 187°F; any hotter, you’ll scorch the sweetness. If you’re wondering about caffeine, yes, coffee extract has caffeine.
Is that grinding noise normal?
Humming = healthy. Gurgling = fine. But if it sounds like a blender full of rocks, unplug it immediately. Air bubbles in the system often pop the reservoir out and back in, like resetting a Wi-Fi router.
Coffee grounds in my cup, should I panic?
A few specks? Normal as popcorn kernels at the movies. A grounds avalanche? You’ve either got a ripped K-Cup (toss it) or needle blockage (time for paperclip surgery). And for the love of caffeine, never reuse pods. It’s like reheating fish in the office microwave; don’t.
Can I tweak the heat like a thermostat?
Fancier models let you choose temps between 187-192°F. Find it buried in settings. Lower temps coddle delicate teas; higher ones punch up dark roasts. No temp control? Preheat your mug; it’s the poor barista’s workaround. Just don’t drink coffee after surgery without checking with your doctor first.
Conclusion
You’ve just unlocked what 90% of Keurig owners never discover: the secret handshake between humans and machines.
This isn’t about buttons and pods anymore. It’s about transforming that plastic box into your personal coffee alchemist.
From that first click of a K-Cup to descaling rituals that feel like spa days, you’re now armed with insider knowledge.
You know why morning brews go weak (clogged needles don’t play), how to resurrect a sluggish machine (vinegar’s your friend), and why water temperature isn’t just a number (it’s the difference between “meh” and “more“).
But here’s the real kicker: Your Keurig’s lifespan and coffee quality? They’re in your hands.
Treat it like a temperamental artist, clean its needles, respect its water preferences, decode its error blinks, and it’ll reward you with years of liquid gold.
So, when you press that brew button tomorrow morning, remember: You’re not just making coffee. You’re conducting a science experiment where you control the variables.
Those café lines? Let them wait. Your kitchen’s now the headquarters of happiness in a mug.


