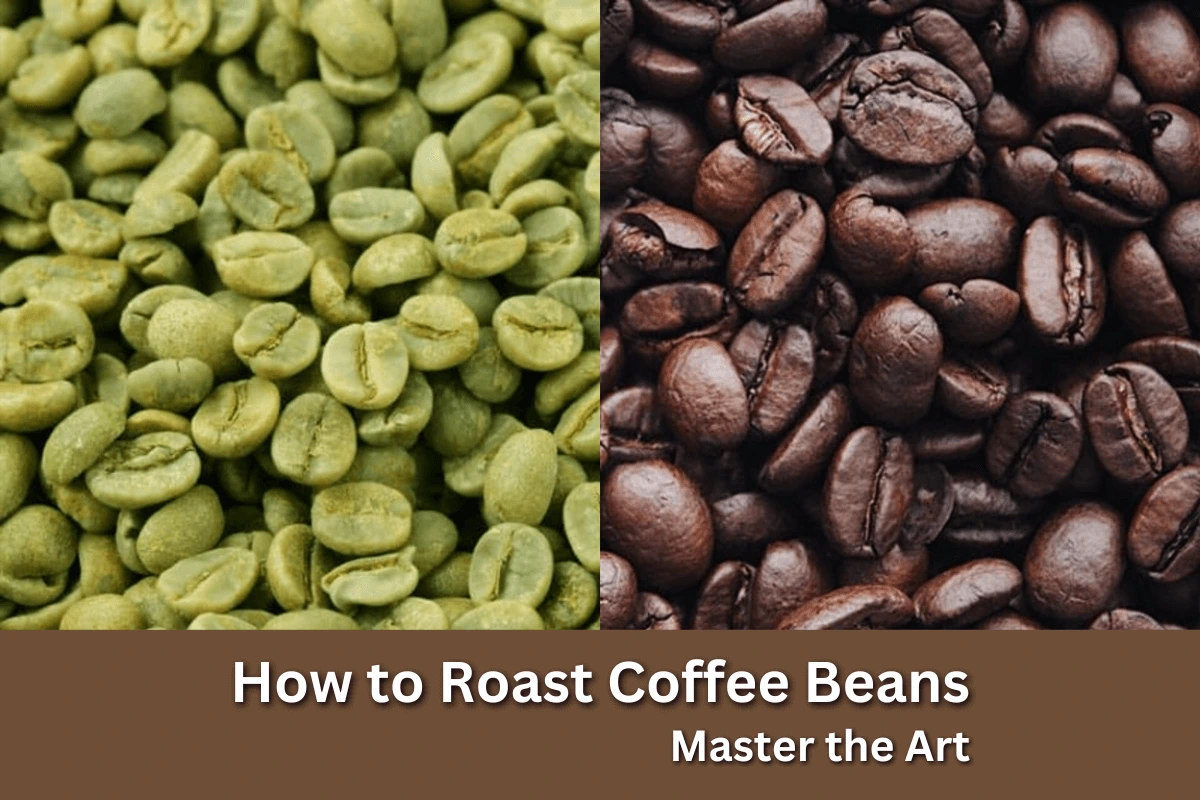
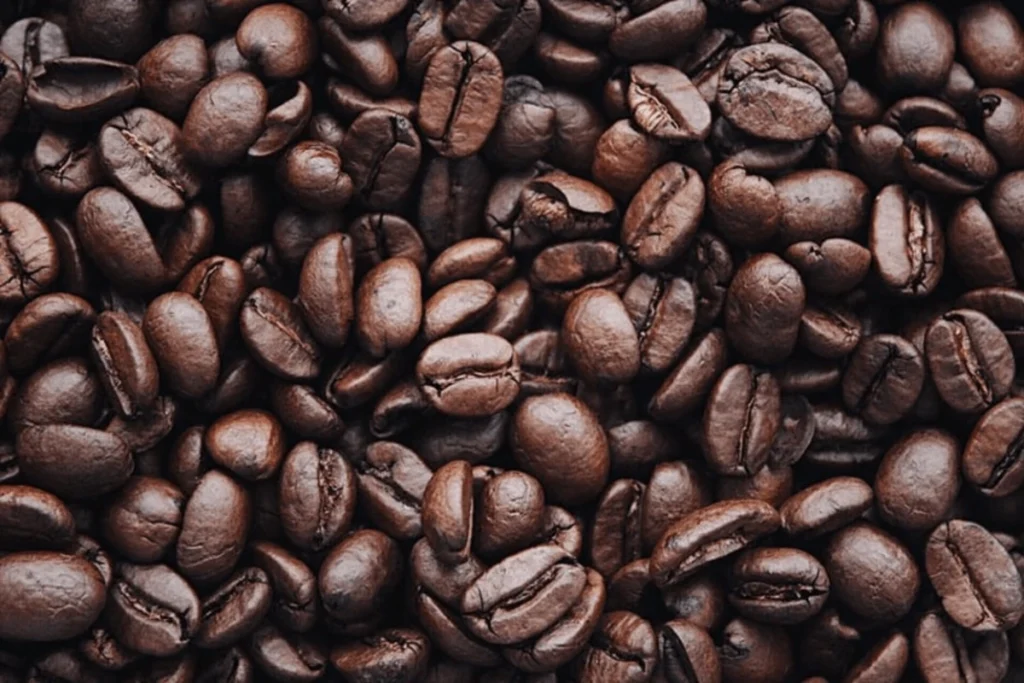
That first-morning sip tastes different from when you roasted the beans.
Think crackling aromas of caramelizing sugars, the thrill of catching first crack’s popcorn-like snap, and flavours so vivid they’ll make store-bought coffee taste like dishwater.
Surprise, it’s not magic. It’s science you can master in your pyjamas. Home roasting isn’t some hipster flex.
It’s your backstage pass to coffee’s soul. Green beans cost a fraction of roasted ones (we’re talking $5 vs. $20 a pound), but the real payoff? Control.
Want a citrusy Ethiopian to zing?
A chocolatey Colombian to soothe? You call the shots. But here’s the secret: it’s easier than baking cookies. Burn a batch? So what.
Your stovetop pan, a $20 popcorn popper, or a countertop roaster can all work.
What You Need Before Starting
The journey to great home-roasted coffee begins with your equipment choice.
Whether starting with essential kitchen tools or investing in dedicated machinery, understanding your options is crucial.
Choosing Your Roasting Method
Your roasting method is like a dance partner; it must match your rhythm. Start simple: a cast-iron skillet on your stovetop costs nothing if you already own one.
It’s raw, hands-on, and teaches you to feel the roast beans crackling under your spatula, colour shifting from grassy green to toasty brown.
But here’s the catch: you’ll babysit those beans like a hawk. One distracted stir, and boom, scorched spots.
Upgrade to a popcorn popper (yes, the $25 gadget from your childhood movie nights), and suddenly, heat distribution gets smarter.
These little machines whirl beans in a hot air cyclone, giving you cleaner, more even roasts. Just don’t overload it; half a cup of greens max, or you’ll choke the airflow.
Now, for the obsessed: dedicated home roasters. Think of these as your coffee’s trainers.
Machines like the Behmor or FreshRoast let you tweak temperatures by degree, track roast curves, and handle bigger batches.
The price stings ($200–500), but it’s a game-changer for weekly roasters. Smoke? Managed. Timing? Precise. Flavor? Consistently yours.
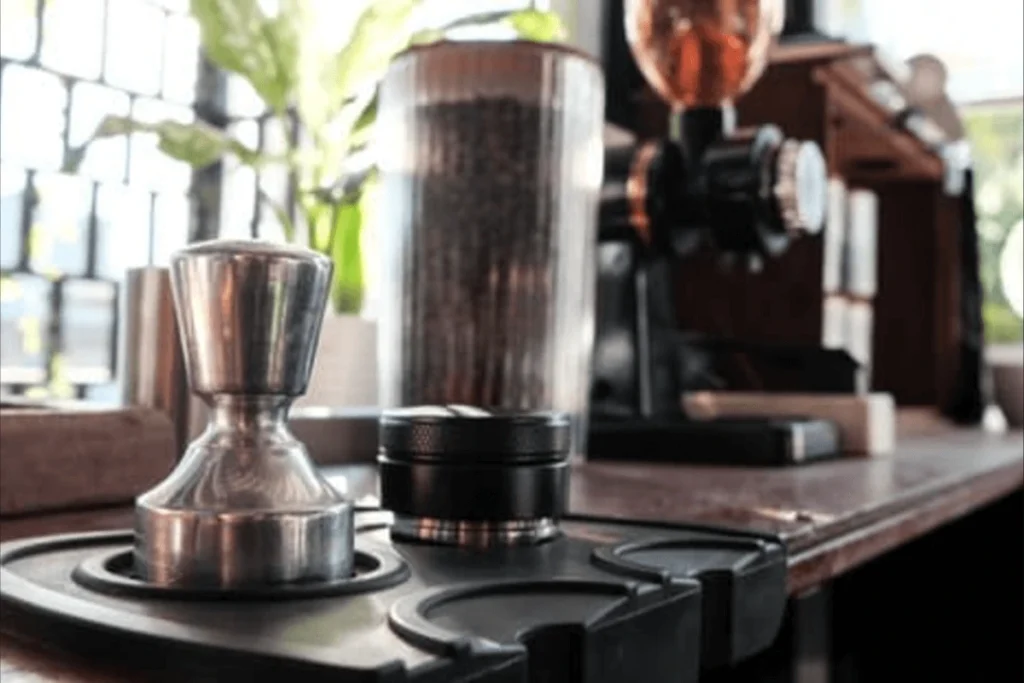
Essential Equipment Options
Your tools don’t need to break the bank, but they do need to earn their keep. Cut through the noise: A cast-iron skillet (20) is the ultimate entry-level warrior.
Pair it with a laser thermometer (40) to track surface temps, and you’ve got a setup that’ll roast small batches with a gritty charm.
Just keep that spatula moving; stagnant beans burn faster than toast.
Craving consistency? A hot-air popcorn popper (25–50) is your next leap. These unassuming gadgets blast beans with heat, so even you’ll swear they’re cheating.
But here’s the hack: rip out the thermal fuse (YouTube it) to bypass auto-shutoff. Suddenly, you’ve got a mini roaster that handles light-to-medium batches like a pro.
Don’t skip the metal colander ($27.99); fast-cooling beans are non-negotiable.
For the dedicated? Home roasters like the FreshRoast SR540 ($350) are the espresso machines of roasting. They’ll juggle heat, airflow, and time while you sip tea.
But know this: they demand respect. Clean the chaff trap after every use, or you’ll battle smokey chaos. And budget for replacement parts, heating elements wear out after 200+ roasts.
Don’t overlook the “extras”:
- Airtight containers with one-way valves (8–15) allow beans to breathe without going stale.
- Heat-resistant gloves ($10) save fingertips when shaking colanders of steaming beans.
- A $20 kitchen scale with 0.1g precision? That’s your secret weapon for repeatable roasts.
Pro tip: All gear needs love. Wipe down skillets with coarse salt to banish oily residue. Vacuum popcorn popper vents weekly to prevent fire hazards.
Calibrate your thermometer monthly; trusting a liar tool is how batches die.
Primary Equipment (By Budget)
Your kitchen already holds the essentials. A heavy skillet (cast iron works best) becomes your roasting pan; add a digital thermometer clipped to its side.
Pair it with a $5 metal colander for rapid cooling. This bare-bones setup demands vigilance: stir nonstop, track temps like a hawk, and embrace the rustic charm of occasional uneven roasts.
30–100 unlocks consistency. A modified popcorn popper (hack: turn off its safety thermostat) becomes a mini-roasting powerhouse.
Add an infrared thermometer (40) to read bean temperatures mid-roast, not just surface heat.
A $20 cooling tray with a hand-crank fan blows away chaff fast, which is critical for avoiding baked flavours. This tier balances cost and control, which is ideal for weekly roasters.
$200–500 is pro territory. Fluid bed roasters (like FreshRoast) use hot air for bright, clean profiles. Drum roasters (Behmor) mimic commercial machines, perfect for oily dark roasts.
Innovative roasters (Kaldi Wide) track roast curves via the app, geek-level precision.
But remember: pricier gear needs pricier care. Budget for replacement burrs, annual descaling, and upgraded ventilation.
Required Tools?
A 0.1g scale is your truth-teller; measure greens by weight, not volume. Heat-resistant gloves (12) prevent blisters when shaking scorching colanders.
Airtight containers with valves ($15) let CO2 escape without oxygen sneaking in. And that chaff collector? It’s not optional.
Ignore it; you’ll pick papery bits from your grinder for weeks. A manual grinder boosts freshness. For French Press fans, here’s the best manual coffee grinder for French Press.
Maintenance Isn’t Optional, It’s Survival:
After each roast, brush out the chaff and the leftover husks combust. Test your thermometer in boiling water; a 2°F drift ruins profiles.
Every 90 roasts, replace popper filters or drum bearings. Annually, disassemble heating elements to banish mineral buildup.
Pro tip: Log maintenance dates on a calendar. Your gear’s lifespan depends on it.
Choosing Gear?
How much coffee do you drink daily? A skillet handles 100g batches, enough for two days. Poppers do 150g; drum roasters 300g+.
Prefer fire-and-forget automation? Innovative roasters let you multitask. Limited on space? Countertop fluid beds beat bulky drums.
Hate tinkering? Avoid modded poppers needing electrical tweaks. Your ideal setup mirrors your lifestyle, not someone else’s Pinterest board.
Equipment Maintenance Guide
Your roaster isn’t just a tool; it’s a living system. Daily, attack chaff like it’s your nemesis. Let those papery flakes linger, and they’ll catch fire mid-roast.
Wipe exteriors with a damp cloth; coffee oils turn rancid and taint flavours. Run your finger over door seals; cracks here leak heat and smoke, betraying your roast’s potential.
Weekly, go full detective. Unplug your machine, then hunt for oil buildup in roasting chambers with a toothbrush dipped in baking soda paste.
Forged carbonized gunk?
It’s a heat distribution killer. Test electrical plugs for loose connections; a wobbly plug could fry your circuit board. Probe thermocouples?
Swab them with isopropyl alcohol; coffee residue lies about temperatures.
Monthly, it’s truth time. Boil water to check your thermometer’s honesty; if it reads 208°F instead of 212°F at sea level, you have a liar.
Lubricate drum roaster bearings with food-safe grease (skip WD-40, it’s toxic). Sniff your exhaust vents; a burnt odour means hidden chaff smouldering.
Update your roasting journal: “July 15, replaced popper fuse, adjusted airflow.”
Quarterly, declare war on scale. Mix citric acid and water and run it through your roaster’s innards. Mineral deposits from hard water?
They insulate heating elements, forcing them to work harder and die younger. Annually, swap worn parts before they fail mid-roast, heating coils, fan blades, and thermal fuses.
Keep a “sacrificial” batch of cheap beans for testing post-maintenance.
Pro Tip: Maintenance isn’t chores, it’s foresight. A clean roaster mirrors in your cup: brighter acidity, cleaner finishes. Neglect it, and even top-tier beans taste like ashtrays.
Set phone reminders for tasks, but let your nose and eyes guide you. Smoke where there shouldn’t be?
A rattling fan? Listen to your gear; it’s whispering secrets about your next roast.
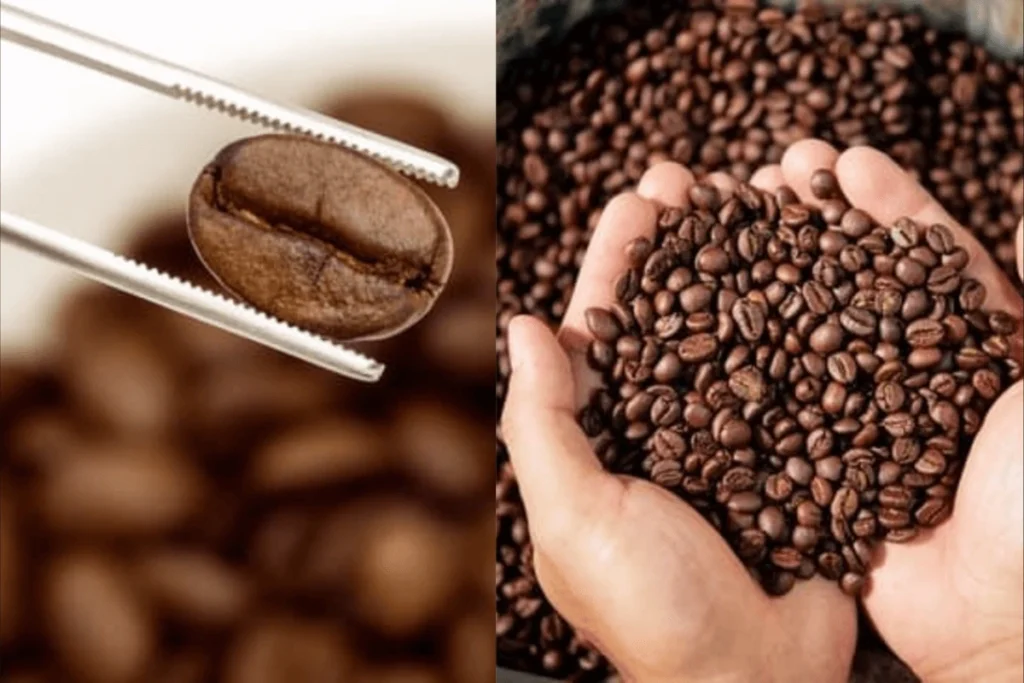
Green Bean Selection Guide
Choosing green beans is like picking wine grapes; the right origin and processing shape everything.
New roasters meet your allies: Brazilian Santos and Colombian Huila. These beans roast like they’ve got training wheels, with forgiving curves and predictable first cracks.
Why? Their lower acidity and balanced sugars caramelize smoothly, masking minor timing errors.
Freshness is non-negotiable. Look for harvest dates within 6 months; older beans lose moisture, roasting unevenly.
Squeeze a handful: dense beans (like Kenyan AA) feel heavy, signalling high-altitude growth and slow sugar development.
Uniform size matters; mix a peaberry with a flat bean and one’s charcoal with the other’s grass.
The processing method whispers secrets. Washed beans (soaked, fermented) offer cleaner, brighter notes, ideal for light roasts.
Naturals (sun-dried with fruit) burst with berry sweetness but demand careful heat to avoid fermented off-notes.
Altitude isn’t just trivia. Beans grown above 1,500 meters (like Ethiopian Yirgacheffe) mature slower, packing complex acids.
Low-altitude beans (Brazil) roast faster, favouring chocolatey depths.
Start small, think big. Buy 2–3 pounds from trusted importers like Sweet Maria’s or Coffee Bean Corral. Avoid bulk deals; you’re learning, not supplying a café.
Sample regional differences: a nutty Guatemalan vs. a floral Costa Rican.
Pro tip: Cup before you commit. Steep 12g of greens (yes, unroasted) in hot water for 4 minutes. Spit. Look for sweetness, not vegetal or woody notes.
Your roast can’t fix bad greens; it’ll only amplify flaws.
Store smart: In a cool, dark drawer, keep beans in breathable cotton bags (not sealed jars).
They’ll stay prime for 12 months but roast within 6 for peak vibrancy. Freezing? Only if vacuum-sealed; moisture is death.
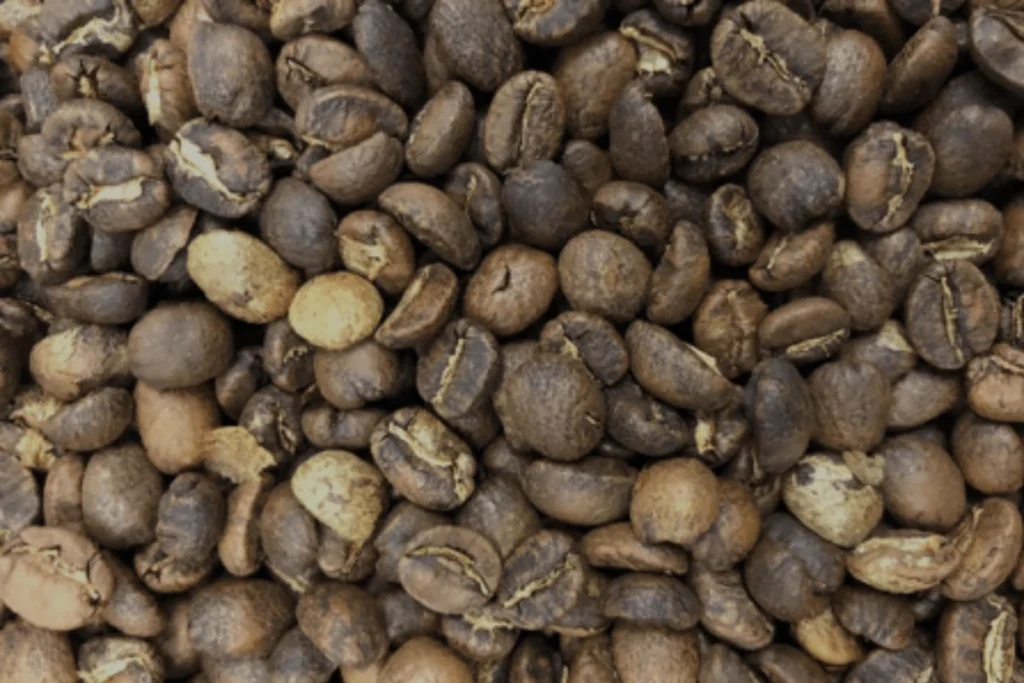
Understanding Coffee Bean Basics
Types of Green Beans
Arabica and Robusta aren’t just categories; they’re entire coffee universes.
Arabica, the delicate artist, thrives above 3,000 feet where cool nights slow growth, concentrating sugars for floral, fruity notes.
But it’s fussy: one frost or pest attack, and the crop’s gone. That’s why 70% of your speciality shops stock it, despite its lower caffeine kick.
Robusta? The rugged survivor. It laughs at heat, pests, and low altitudes, pumping out twice the caffeine as a natural insect repellent.
Its bold, earthy punch shines in espresso blends, adding crema and body.
But here’s the twist: high-end Robusta, like Indian Cherry or Ugandan Organic, can surprise with chocolatey depth if roasted right.
Arabica’s Royal Family:
- Typica: The OG. Planted in 1700s Java, it’s the genetic blueprint for most Arabicas. Expect tea-like acidity and a clean finish.
- Bourbon: Born on Réunion Island, this Typica cousin oozes brown sugar sweetness. Perfect for medium roasts.
- Caturra: A dwarf Bourbon mutation from Brazil. Brighter acidity and shorter trees are ideal for dense plantations.
- Gesha: The diva. Discovered in Ethiopia, ignored for decades, it is now cult-famous for jasmine and peach notes. Roast it lightly, or lose the magic.
Robusta’s Hidden Gems: While mass-market Robusta fuels instant coffee, terroir-driven versions exist.
Vietnam’s Dak Lak beans, shade-grown and wet-processed, offer nutty, less bitter profiles. Indonesia’s Java Robusta?
Aged for three years, it develops a cedar spice that espresso nerds hoard.
Bean Density and Size Impact
Dense coffee beans are the marathon runners of the coffee world; grown slowly at high altitudes, their tight cellular structure packs in sugars and acids like a compressed spring.
When you roast them, they’ll stubbornly resist heat at first, then explode with flavour if you’re patient.
But rush the roast, and you’ll scorch the outside while the core stays grassy.
Size matters as much. Picture this: a batch with peaberries (small, round beans) mixed with flat, broad beans.
The peaberries hit the first crack while their larger siblings are still pale. Result? A cup that’s both bitter and sour.
That’s why pro buyers sort beans through screens and numbered sieves that grade size. Screen 18 (18/64″ holes) catches premium beans, while screen 14 is your budget blend.
Density Decoded:
Press a bean between your teeth. High-density (hard) beans barely dent; they’re maybe from Ethiopia’s Sidamo hills.
Low-density (soft) beans crumble more easily, like Brazilian Cerrado. Are you not into biting beans? Weigh 100g and pour them into a measuring cup.
Dense beans occupy less space, like sand versus gravel.
Pro Hack: Roast dense beans hotter upfront. Their toughness can take the heat; you’ll need that energy to penetrate.
Soft beans? Start low and slow; their delicate structure burns like tissue paper.
Size Uniformity Fix: Can’t afford pre-screened beans? Use a colander with uniform holes to sift your greens. Even 30 seconds of shaking separates sizes.
Roast each group separately, then blend post-roast. Yes, it’s extra work, but your taste buds will throw a party.
Altitude’s Double-Edged Sword: High-grown = dense = complex. But guess what? That complexity means more variables to nail.
Miss your target temp by 5°F; those floral notes morph into aspirin bitterness. Low-altitude beans? Forgiving but predictable, like a pop song versus a symphony.
Regional Characteristics
Coffee’s birthplace writes its flavour story. Take Ethiopia’s misty highlands, volcanic soil and heirloom varietals birth beans that burst with blueberry jam and bergamot.
But cross to Yemen’s arid mountains, and those same species morph into winey, wild profiles, sun-dried on rooftops over camel leather. It’s not just genetics; it’s place.
Central America’s volcanic slopes (think Costa Rica’s Tarrazú) infuse coffee with crystalline clarity.
Spring water washes away fruit pulp, letting caramelized sugars and honeyed acidity shine. Contrast that with Sumatra’s humid jungles, beans dried in sticky air on bamboo mats absorb earthy, mossy notes.
Even processing adapts to climate: Brazil’s dry summers favour natural processing, while Colombia’s rains demand washed methods.
Altitude’s Flavor Calculus:
- 1,000–1,500m (Guatemala Antigua): Bright apple acidity, milk chocolate body.
- 1,500–2,000m (Kenya Nyeri): Blackcurrant punch, sparkling citrus.
- 2,000m+ (Ethiopia Yirgacheffe): Jasmine florals, a tea-like delicacy.
- Lowlands (Vietnam’s Dak Lak) bake bolder, simpler flavours; think roasted nuts and dark cocoa.
Lowlands (Vietnam’s Dak Lak) bake bolder, simpler flavours; think roasted nuts and dark cocoa.
Soil’s Secret Handshake:
Volcanic ash (Hawaii Kona) = mineral tang.
Red clay (Brazil Cerrado) = nutty sweetness.
Limestone (Jamaica Blue Mountains) = buttery smoothness.
Pro Tip: Match your roast to the region. Delicate Ethiopians? Light roasts preserve their floral whispers.
Sumatrans? Push to medium-dark to mellow their earthy funk into cedar depth. And always, always ask your supplier: “How was this processed?” A washed vs. natural Kenyan changes everything.
Bean Origin Impact on Roasting
Ethiopian and Kenyan beans are the thoroughbreds of coffee, delicate, high-strung, and bursting with volatile aromatics.
Roast them like you’re searing ahi tuna: crank the heat to 400°F+ upfront. This shocks their dense structure, racing them through the drying phase before floral compounds vaporize.
The first crack hits early (around 8 minutes) but holds steady; push development time 15-20% past the crack for balance.
Pull too soon, and you’ll get sour tea; too late, and those jasmine notes turn ashy.
Brazilian and Colombian beans? Think slow-cooked brisket. At their lower altitude, softer beans caramelize best with a gentle start (350°F charge).
Extend the Maillard phase; that’s where cocoa and hazelnut notes emerge. Let them bask in 12-14 minutes of roast; their sturdy structure won’t buckle.
Pro move: Add 30 seconds post-first crack for a milk chocolate finish. Overdo the heat early, though, and you’ll mute their inherent sweetness into flatness.
Indonesian beans play hardball. Sumatra’s wet-hulled processing traps moisture, making them steam bombs if rushed. Start low (325°F), stretch drying to 5 minutes, visualize wringing out a sponge.
Then, increase the heat to 5°F/min, letting earthy notes deepen without charring. Finish hot (435°F) to mimic their traditional wood-fired roasts.
Skip this patience, and you’ll get a muddy, bitter cup haunted by raw peanut flavours.
Pro Hacks:
- Ethiopian curveball: If beans crack too early, cut heat 10% post-drying to avoid bake-out.
- Colombian save: Stalled roast? Boost airflow to reignite Maillard without scorching.
- Sumatra SOS: Detected grassy notes mid-roast. Extend development time by 1 minute; it’s their Hail Mary.
Altitude dictates heat strategy. Density demands timing. Processing sets the clock.
Your roaster isn’t just applying heat; it’s negotiating with landscapes, traditions, and bean DNA.
Storage Requirements
Green beans aren’t dormant; they’re alive, breathing, and plotting their flavour escape. Store them wrong, and they’ll turn into traitors.
Keep them in a pantry corner where temps swing wildly? They’ll sweat moisture by day and suck it back by night, ageing five years in five months.
Your defence: a dark, stable nook (think closet interior) at 60–75°F. No garages, attics, or spots near ovens; their mood swings ruin beans.
Humidity is the silent killer. Above 60% mould spores, throw raves in your bean stash. Below 50%, beans desiccate into flavourless pebbles.
Use a $10 hygrometer; toss silica gel packs in the storage bag if your air feels tropical. But avoid plastic bins; they trap moisture.
Go for breathable cotton sacks inside sealed totes, airflow without dampness.
Light? It’s the enemy of longevity. UV rays break down chlorogenic acids, robbing future brews of brightness.
Keep beans in opaque containers, never glass jars on sunlit shelves. And smell them monthly; a whiff of must or ammonia means trouble brewing.
Method-Specific Safety Guide
Stovetop roasting turns your kitchen into a live fire drill. Beans pop like mini grenades, hot oil splatters, and chaff ignites in seconds.
Arm yourself: heat-resistant gloves (not oven mitts, sponges for boiling bean juice), goggles (trust me, a flying shard to the eye kills the vibe), and a baking sheet nearby to smother flames.
Roast outdoors if possible; your smoke detector will become your nemesis. Never, ever, step away mid-roast. Coffee burns faster than toast.
Popcorn poppers? They’re ticking time bombs if abused. That $25 gadget draws 1,200+ watts; plug it into a shared outlet, and you’ll trip breakers mid-batch.
Dedicate a circuit or roast near your dryer’s outlet. Keep a fire blanket under the popper; chaff piles under the machine can flash ignite from radiant heat.
Memorize this drill: unplug →, smother, →, evacuate. And no, you can’t “pause” to answer the door; abandoned poppers morph into molten plastic puddles.
Home roasters demand respect. That $500 machine’s exhaust isn’t a suggestion; vent it outside or coat your walls in oily residue. Chaff? It’s kindling.
Clean traps after every roast, or risk a chimney fire. Monthly, check for frayed wires (bean oils corrode insulation).
And never, ever bypass thermal fuses; they’re the last line between a perfect dark roast and a 911 call.
Roasting Methods
There are so many roasting methods out there. Which one you will choose is up to you. So, before selecting a perfect one, read the full blog post.
This will allow you to determine whether your current method is suitable or if you need to adopt any discussed one.
In our How to Roast Coffee Beans blog post, we added many expert sections for more options.

Home Roasting Machines
Home roasters are the espresso machines of the coffee roasting world, precision tools for those who geek out on data and repeatability.
Fluid bed roasters (like the FreshRoast SR800) blast beans with hurricane-force hot air, mimicking commercial setups.
They’re speed demons, roasting a batch in under 10 minutes, perfect for preserving Ethiopian beans’ floral highs.
Drum roasters (Behmor 2000AB) rotate beans like a rotisserie, coaxing out the chocolate depths of Sumatrans through gradual, radiant heat.
Your choice here shapes your coffee’s soul: fluid beds favour bright, tea-like clarity; drums build a syrupy body.
The magic lies in the knobs and screens. Programmable profiles let you save “Ethiopian Light Roast: 392°F, 9:30min” like a coffee playlist.
Chaff collectors? They’re not just tidy; they’re fire prevention. Skip cleaning them, and you’ll host a mini bonfire mid-roast.
Built-in cooling is the unsung hero: hit a button, and fans whirl, freezing beans at their peak. No more frantic colander-shaking while smoke billows.
But here’s the kicker: even pro machines demand your attention. Is that digital display showing bean temp? It’s often 15°F off unless calibrated monthly.
And “set it and forget it” is a myth; walk away, and Yemeni beans go from raisin-sweet to tyre fire in 90 seconds.
Popcorn Popper Technique
That dusty popcorn popper in your closet? It’s secretly a coffee-roasting wizard. Crank it outdoors (the smoke is real), and watch it work magic.
Here’s the ritual:
Preheat like you mean it. Two minutes empty; this primes the heating coil. Drop in cold beans too soon, and they’ll bake unevenly.
½ cup greens max, overload it, and beans jam the chamber, roasting as unevenly as a checkered tablecloth.
The first crack is your drumroll. Listen for rapid snaps around 4-5 minutes; that’s your cue for hovering.
Peek through the lid: beans morph from grassy green to honey yellow, then cinnamon brown. Too slow?
Unplug, cool, and restart. Poppers overheat fast; let them breathe between batches.
Cooling is non-negotiable. Dump beans into a metal colander the second you hit your target roast. Toss them like a salad; airflow is key.
Linger and the residual heat will creep into the dark roast territory.
Aftercare: Brush out chaff religiously. Those papery flakes clog vents and combust. For deeper roasts, mod the popper: yank out the metal thermostat plate (it’s throttling your heat).
Suddenly, you’ve got a mini turbocharger.
Pan/Stovetop Method
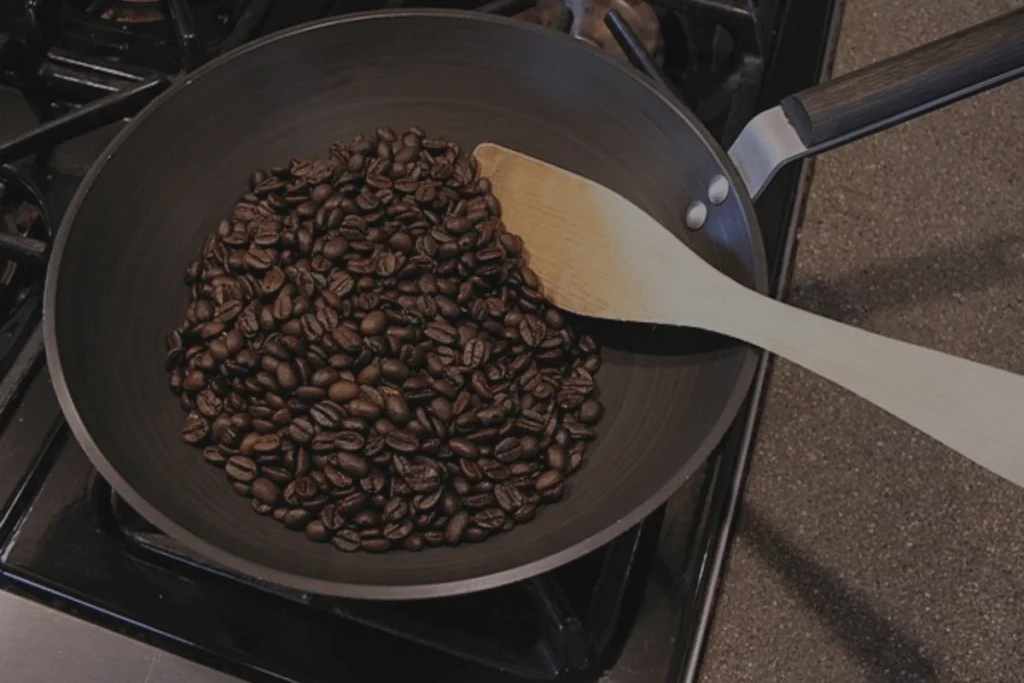
Pan roasting is coffee’s ancient roots, raw, unplugged, and brutally honest. Grab a cast-iron skillet (the thicker, the better) and crank it to medium-high.
No fancy gadgets here, just you, heat, and beans that’ll test your focus. Pour in a single layer of greens (½ cup max).
Now, stir like you’re scrambling eggs on a deadline. Stop even for 10 seconds, and scorch marks will mock your efforts.
Listen for the whispers. The first crack arrives as sharp snaps around 8 minutes in. Smoke starts thin, then billows like a campfire.
Your eyes lie; your nose doesn’t. Sniff for the shift: grassy → toasty → caramel. Too much smoke? Kill the heat, but keep stirring. Beans carry enough residual heat to finish.
Colour tells all. Target city roast (medium)? Pull when beans shine like milk chocolate.
Want French roast? Push until oily, but taste the air; burnt sugar means you’ve crossed the line.
Cool, like a pro. Dump beans into a metal colander. Toss them over a fan or balcony railing; speed is survival.
Left to languish, they’ll keep roasting from within, sabotaging your hard work.
Pan Pitfalls:
- Uneven heat? Swirl the pan like a whiskey tumbler between stirs.
- Chaff chaos? Roast outdoors, it’s like confetti from a coffee gremlin.
- Bitter results? Lower the heat next time. Patience > power here.
This method teaches what machines hide and the feel of roast stages. Beans go limp during drying, then crackle to life.
Master this, and every other method becomes child’s play.
Oven Roasting Process
Oven roasting is like herding cats, possible but messy. Crank your oven to 450°F (232°C), but don’t trust its dial. Use a standalone thermometer; most ovens lie by 25°F.
Spread beans in a single layer on a perforated pizza pan (holes = airflow = fewer scorch marks).
Forget baking sheets; they trap steam, turning beans into unevenly baked cookies.
The Stirring Tango: Every 2 minutes, yank the pan out. Stir like your coffee’s life depends on it. Beans on the edges roast faster; swap them centerward.
No pauses, no distractions. The first crack arrives as faint pops around 12 minutes, your cue to hover. Second crack? It’s a whisper here.
Pull beans before you hear it, or they’ll coast into charcoal.
Smoke Signals: Your kitchen will fog up. Crack a window, but don’t panic.
Smoke peaks at first crack; time your exit. Cool beans fast: dump them onto a wire rack set over ice packs. Lazy cooling = over-roasted bitterness.
How to Roast Coffee Beans
Roasting coffee is like conducting an orchestra; every degree, second, and crack matters.
Let’s walk through the metamorphosis of a humble green bean into a flavour-packed marvel.
Early Stages (0-8 minutes)
Cold, dense beans hit the heat, trembling through a chlorophyll blush, sage green fades to straw yellow.
This is the drying phase, where beans sweat moisture, hissing softly as they shed 15% of their weight. They’ll shrink briefly, then swell like tiny balloons.
Keep the heat steady here; too aggressive, and you’ll scorch; too timid, and the roast stalls. The aroma shifts from fresh-cut grass to baking bread.
First Crack (8-10 minutes)
At 385°F (196°C), the beans rebel. A chorus of snaps echoes, the first crack, as internal pressure fractures their structure.
Oils begin migrating outward, sugars caramelize, and the real magic starts.
This is your point of no return: pull now for bright, acidic light roasts (think lemon zest and floral highs). Let the beans ride the heat and mellow into caramel sweetness.
Development Phase (10-12 minutes)
Post-crack, the roast’s soul takes shape. Heat management here is everything. Light roasts demand a swift exit, linger, and those delicate jasmine notes vaporize.
Extend the roast by 1–2 minutes for medium roasts, letting sugars deepen into honey and cocoa. Watch the colour: cinnamon brown → milk chocolate.
In this phase, patience pays; rush it, and bitterness creeps in; drag it, and you’ll mute vibrancy.
Second Crack (12-15 minutes)
At 435°F (224°C), a softer, faster crackle whispers, second crack. Oils surge to the surface, flavours intensify, and the beans flirt with danger.
This is dark roast territory: smoky, bold, with bittersweet tension. Wait too long, and the oils ignite, leaving a charcoal tang. This is French roast coffee territory.
Stop just as the sheen appears, and you’ll capture espresso-worthy depth.
The Science of Roasting
Coffee roasting isn’t just cooking beans; it’s a high-stakes chemistry experiment.
Every degree tweak, every minute timed, opens a world of flavour. Let’s break down the alchemy.
Drying Phase (0-8 minutes, 0-180°C/356°F):
Green beans enter the heat like athletes hitting a sauna. Moisture, the enemy of crisp flavours, steams away, turning beans from forest green to pale straw.
They shrivel momentarily, then puff like popcorn kernels pre-pop.
This phase is all about gentle patience: rush it, and you’ll trap grassy notes; nail it, and the stage is set for sweetness.
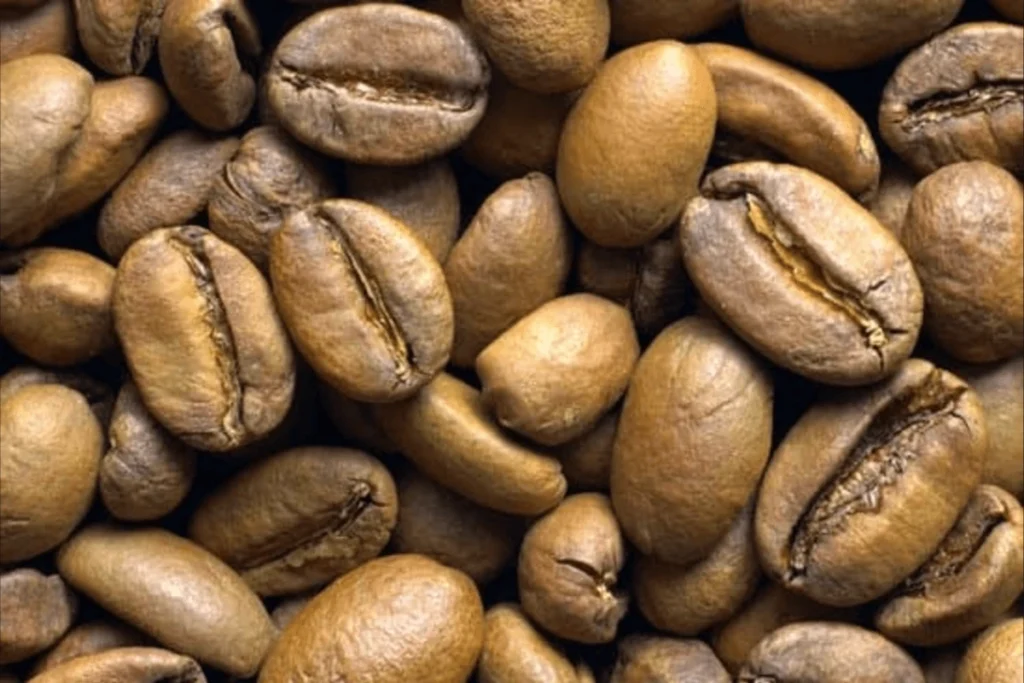
Yellowing and Light Brown (8-10 minutes, 180-220°C/356-428°F):
Now, the sugars awaken. Caramelization creeps in, not the burnt sugar of crème brûlée, but a slow, golden dance.
Beans blush light brown, releasing warm, toasty aromas. Here, heat control is a tightrope: too much fire and sugars scorch; too little and the roast flatlines.
This is where your nose becomes your guide, and you sniff for the shift from wet hay to baking bread.
First Crack (10-11 minutes, 220-230°C/428-446°F):
A percussive snap echoes, the sound of beans fracturing under pressure. Cell walls burst, releasing trapped CO2, and oils slowly ooze to the surface.
This moment is your flavour fork in the road: light roasts bow out here, all citrus zing and floral whispers.
Let the beans ride the heat, and deeper notes of cocoa and nut emerge.
Development Phase (11-13 minutes, 230-240°C/446-464°F):
Post-crack, the roast’s soul forms. Maillard reactions (the same magic behind seared steaks) kick in, marrying amino acids and sugars into complex flavours.
Light roasts flee early to preserve brightness; medium roasts linger, building body.
This phase is a dialogue between heat and time; extend and caramel deepens; cut it short, and acidity dominates.
Second Crack (13-15 minutes, 240-250°C/464-482°F):
A softer, faster crackle signals the final act. Oils surge outward, glossing beans in an oily sheen.
Flavors intensify into smoky, bittersweet territory. But tread carefully: this phase is a countdown to combustion.
Stop too late, and you’ll trade depth for ash.
Mastering the Fire
Control isn’t just about dials; it’s reading the beans’ cues. Track the rate of rise (RoR), the speed at which beans heat up.
Let RoR plummet post-first crack, and the roast stalls; let it spike, and flavours scorch.
Adjust airflow like a conductor’s baton: more oxygen fans flames, less lets flavours simmer.
Critical Levers to Pull:
- Charge Temp: Start too hot, and early sugars burn; too cold, and the roast drags.
- Turning Point: That moment beans stop cooling and start heating? Nail it, or fight unevenness all roast.
- Development Time Ratio: Spend 20–25% of total roast time post-first crack for balanced sweetness.
Ever tasted “baked” coffee? That’s a RoR crash; flavours go flat, like soda left open. Keep the rise steady, and flavours stay vibrant.
Mastering Roast Levels
Light, medium, and dark, these aren’t just settings. They’re entire flavour universes.
Your roast-level choice isn’t a dial twist; it’s a declaration of taste. Let’s decode each tier’s soul.
Light Roast Technique
Pull beans moments after the first crack ends (around 400°F), and you’ll taste the earth they grew in.
Ethiopian beans sing floral highs; Colombians sparkle with apple acidity. The beans stay dry, and their surface is matte, like unpolished wood.
Caffeine peaks here, but so does risk; one degree over, and delicate notes vaporize. Roast too light, and you’ll sip grassy tang.
Nail it? It’s like biting into a sun-ripened peach.
Medium Roast Process
This is coffee’s sweet spot.
Between the first and second crack (410–428°F), acids mellow into a golden caramel, body plumps like a down pillow, and origin notes waltz with roast depth.
Brazilian beans here ooze milk chocolate; Guatemalans hum with honey. The bean surface glows like polished mahogany, with no oil, just warmth.
Miss the window, and balance tips bitter or flat.
Colombian beans thrive at medium roasts. Curious about their flavor? Discover what Colombian coffee tastes like.
Dark Roast Method
The second crack (437°F+) is your gateway to the shadows.
Oils rise like obsidian tears, smokiness eclipses origin quirks, and bitterness becomes a feature, not a flaw.
Sumatrans thrive here, their earthy funk softening into cedar depth. But walk the edge carefully, roast 30 seconds too long, and your beans taste of campfire ash.
Custom Roast Profiles
Your gear and greens dictate possibilities. A dense Ethiopian needs a hotter start than a soft Brazilian.
Chasing blueberry bombs?
Stretch development time post-first crack. Want chocolate without bitterness?
Cap the roast at 430°F. Track every variable: charge temp, airflow tweaks, even ambient humidity.
Your notebook becomes the Rosetta Stone of repeatable perfection.
Pro Pitfalls:
- Light roast too sour? Extend drying time by 1 minute for the next batch.
- Medium roast flat? Boost heat to 15°F at the first crack’s end.
- Dark roast ashy? Lower charge temp; let sugars caramelize slowly.
There’s no “best” level, only what makes your palate soar. Light roast a Brazilian? You’ll mute its chocolate for citrus it never had.
Dark roast a Yemeni? You’ll trade its winey funk for generic smoke.
Quality Control and Troubleshooting
Your beans whisper secrets if you know how to listen. Let’s decode their language, from colour shifts to crackles, and fix what’s gone wrong.
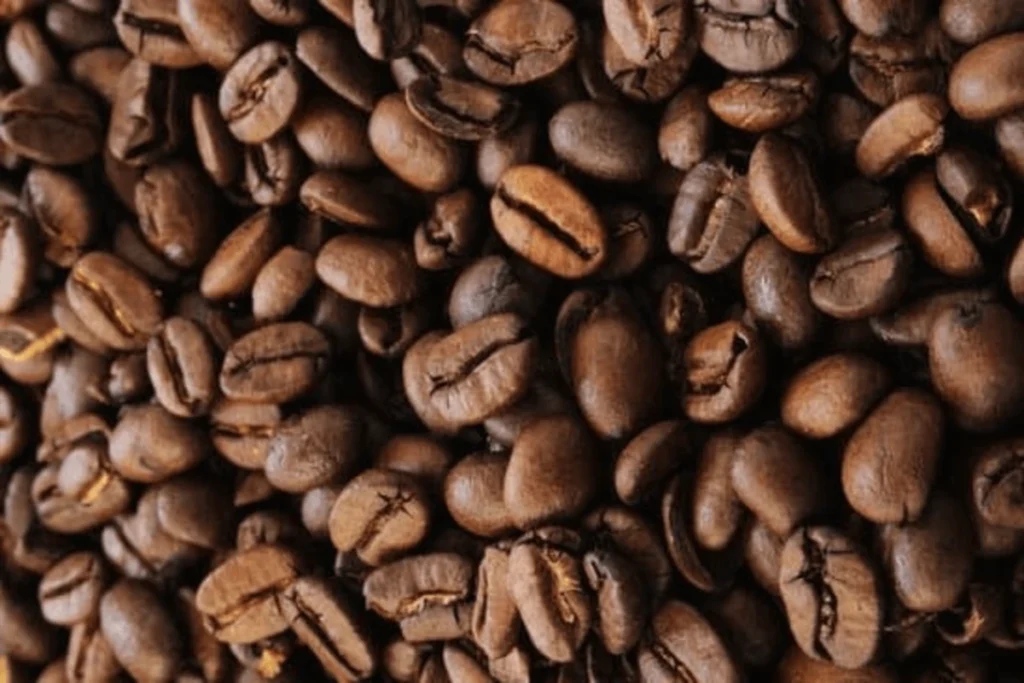
Visual Assessment
Watch beans morph from jade-green newcomers to amber adventurers, deepening into espresso-toned veterans.
Uneven colouring? That’s your roaster’s cry for help. Scorched spots (coal-black freckles) scream, “Too hot, too fast!” while tipped ends (burnt bean tips) reveal lazy stirring.
Perfect beans wear their roast like a uniform, with no patched stains, just smooth gradients.
Forge ahead if you see one rebel; abort the mission if half the batch rebels.
Sensory Indicators
Sniff the journey: fresh-cut grass →, warm toast →, caramel drizzled on apples. Miss the bread-like aroma post-first crack? Your heat’s too low.
Hear the first crack’s sporadic pops turn into the second crack’s machine-gun rattle? That’s your countdown clock.
Smoke matters too, a wispy veil for light roasts, a choking fog for dark. You’ve gone too far if your kitchen looks like a bonfire pit.
Common Problems and Solutions
Problem: Temperature Tango Gone Wrong
Roasts that swing from lukewarm to inferno birth uneven flavours. Maybe your stove’s cycling heat or your popper’s dying.
Fix: Anchor your heat. Gas stoves? Use a diffuser. Electric? Preheat longer. Track temps every 30 seconds; roasting’s a rhythm, not a free jam.
Problem: Patchy Roasts, Uneven Sips
Beans tanning unevenly? They’re not getting enough dance time. Skillet users, stir like you’re whisking eggs, not folding batter.
Popper folks, half-fill the chamber so beans can shimmy freely. Drum roasters? Check baffles for clogs.
Problem: Baked, Not Bold
Coffee tastes flat, like yesterday’s toast? You “baked” it, linger too long in the 300°F zone, and the flavours evaporate.
Fix: Hit the drying phase hard and fast. If your roast stalls, nudge the heat up to 15°F, no mercy.
Problem: Scorched Earth Tactics
Blackened beans aren’t “dark roast”; they’re casualties. Blame grimy equipment (oil residue creates hotspots) or impatient heat spikes.
Fix: Scrub your gear raw after each roast. Stir twice as fast when beans hit 350°F; they’re primed to burn.
Post-Roast Essentials
Your roast isn’t done when the heat stops; it’s done when the beans are saved from themselves. Let’s rescue your hard work from mediocrity.
Proper Cooling Methods
Hot beans keep cooking like a train with no brakes. Dump them into a metal colander, and toss like you’re panning for gold.
Chaff flies, heat flees. Use a fan on high; airflow is your ally. Stir nonstop for 5 minutes until beans feel lukewarm.
Check their temp with your palm; keep tossing if they’re warmer than your cheek.
Skip this, and your light roast becomes medium, and your dark roast becomes charcoal.
Degassing Explained
Freshly roasted beans are gas grenades. CO2 builds inside, desperate to escape. Seal them too soon, and your coffee bags puff up like balloons.
But let them breathe too long, and flavours oxidize into staleness. Here’s the sweet spot:
- Espresso: Wait 2–5 days. CO2 helps crema, but too many blasts away flavour.
- Drip/Pour-Over: Peak at 5–7 days, calm gases, and harmonize flavours.
- Cold Brew: 7–12 days. Mellow vibes only.
Store beans in valve-sealed bags during this phase. They’ll hiss when squeezed, a sign they’re alive and evolving.
Storage Solutions
Oxygen is coffee’s Grim Reaper. Kill it with airtight containers featuring one-way valves; they let CO2 out without letting air in.
Please keep them in a cupboard, far from sunlight and spice racks (coffee absorbs odours like a sponge).
Avoid the fridge; condensation is a silent killer. Freeze only if vacuum-sealed; even a moisture whiff turns beans into chalk.
Freshness Timeline
- Day 1–3: Bright, wild, chaotic. Espresso may fizz like soda.
- Day 4–7: Flavors marry, acidity and sweetness find balance.
- Day 8–14: Prime time. Every note sings in harmony.
- Day 15–30: Slow fade. Chocolate notes linger; fruits retreat.
- Day 30+: Stale. Tastes like dust and regret.
Coffee Grounds
Chaff and spent grounds aren’t waste; they’re garden gold. Mix them into compost to enrich the soil, but avoid dumping piles directly onto plants.
Acid-loving roses and blueberries thrive with coffee boosts; tomatoes and lavender hate it.
Pro tip: Dry grounds completely before storage; mouldy coffee mulch helps no one.
Reuse resources sustainably. Find out if you can reuse coffee pods effectively.
Advanced Techniques
Blending coffee isn’t mixing beans; it’s composing a symphony. Start with a base bean that brings body (think Brazil’s chocolatey Cerrado).
Add 30% Ethiopian Yirgacheffe for floral highs, then 10% Sumatran Mandheling for earthy bass notes. Learn the difference between light roast and dark roast to refine your blends.
Roast each component separately: light for the Ethiopian and medium-dark for the Sumatra. Blend post-roast to control each voice.
Seasonal shifts? Swap summer’s bright Kenyan accent beans for winter’s Guatemalan cocoa tones.
Profile Development
Building a profile is like mapping a road trip. Plot your rate of rise (RoR) to avoid flavour traffic jams.
Start with a high charge temp (400°F) to push through drying fast, then ease off to let sugars caramelize.
Track development time ratio: if your 12-minute roast spends 3 minutes post-first crack, that’s 25%. Too acidic?
For the next roast, stretch that to 30%. Cool beans 50% faster? Note how acidity sharpens.
Seasonal Adjustments
Winter’s dry air roasts faster; drop charge temps by 10°F to compensate. Humid summer days? Extend drying time by a minute; moisture fights heat.
Stored beans from rainy harvests? They’ll roast slower and preheat 15°F hotter.
Even your roaster’s location matters: garage setups in July need exhaust fans; winter kitchen roasts demand sealed windows.
The Roasting Journal
Your journal isn’t a diary; it’s a crystal ball. Log everything:
- *July 14: Ethiopian Guji, washed. Charge 390°F. First crack 9:15. Development 2:30. Notes: Jasmine strong, but body thin. Adjusted: +5°F charge next batch.*
- Defects: Scorching in batch #32 → cleaned chaff screen.
- *Winning combo: 55% Colombia Huila (medium) + 45% Uganda Bugisu (light-dark blend).*
Record Keeping
Spot trends only data reveals. Notice all your African roasts stall at 350°F? Maybe your drum speed’s too high.
See flavour fade in day 7 storage? Switch to smaller containers. Logging isn’t nerdy; it’s how you turn accidents into breakthroughs.
Roasting for Different Brew Methods
Your roast profile isn’t one-size-fits-all; it’s a key that unlocks each brew method’s potential.
Here’s how to tweak your espresso, filter, cold brew, and French press approach.
Espresso Roast Tips
Espresso’s 9 bars of pressure demand beans that can take a beating. Target medium-dark to dark roasts, but not charcoal.
Extend development time 25–30% post-first crack to build body and caramelized sugars that balance espresso’s intensity.
Charge 15°F cooler than usual; slow and steady wins the extraction race. Watch for oil just beginning to speckle the bean surface; too much, and your shots turn bitter.
Pro move: Roast Brazilian beans with a declining rate of rise (RoR) to highlight their nutty sweetness under pressure.
Filter Coffee Profiles
Pour-over and drip methods crave clarity. Light to medium roasts rule here, with a faster initial heat surge to preserve acidity.
Charge hot (400–410°F) to speed through drying, then ease off to let floral/fruity notes bloom. Keep beans dry, with no oil sheen, for crisp separation of flavours.
Ethiopian naturals thrive here: roast them to city+ (medium), and watch blueberry notes pirouette across your palate.
Cold Brew Optimization
Cold extraction mutes acidity, so your roast must compensate. Go medium-dark, but stop short of the second crack.
Stretch the development phase to convert acids into caramel, and finish at 430°F to avoid oily beans (they clog steeped grounds).
Uniform bean size is critical; use a sieve to sort greens pre-roast.
Colombian beans shine here: their chocolate undertones deepen into fudgy richness over 18-hour steeps.
French Press Specifics
Immersion brewing rewards boldness. Roast to medium-dark (whole city), giving extra time in the Maillard phase to build a velvety body.
Balance is key: enough acidity to lift flavours but not so much that it clashes with the Press’s oils.
Central American beans (like Guatemalan Antigua) excel here. Roast them with a steady RoR and get a lush and layered cup.
Brew-Specific Pro Tips:
- Is espresso too harsh? Cut development time by 15 seconds next roast.
- Filter coffee flat? Boost charge temp 10°F to sharpen acidity.
- Is cold brew weak? Extend roast development by 1 minute for heavier body.
- Is French Press muddy? Roast 5°F cooler to maintain flavour separation.
Each brew method is a lens magnifying different roast qualities.
Espresso amplifies the body, filter highlights nuance, cold brew smooths edges, and French Press celebrates texture.
Turn your Nespresso into an iced coffee bar with how to make Nespresso iced coffee.
Frequently Asked Questions
How long can I hoard green coffee beans before they go bad?
A: Think of greens like good wine; they age, but not forever. Stashed in breathable bags (no plastic!) in a cool, dark spot (65°F-ish), they’ll stay lively for 12 months. But here’s the kicker: roast them within 6 months for peak zing. Spot white mould or smell wet cardboard? Toss ’em. Pro tip: Freeze extras in vacuum-sealed packs and thaw overnight in the fridge before roasting.
Can I re-roast my sad, underdone beans?
A: Would you reheat coffee in the microwave? Exactly. Re-roasting scorches existing flavours without fixing what’s broken. Those grassy notes? They’ll taste burnt-grassy. Start fresh with greens; your taste buds deserve better.
Why do my beans look like a tie-dye shirt post-roast?
A: Uneven colouring screams “lazy heat or lazy hands.” Skillet users, stir like you’re scrambling eggs on high heat. Machine roasters? Clean your drum; chaff buildup creates hot spots. Still patchy? Your batch size is too big. Half it, and watch colours even out.
My coffee tastes like a lawnmower ran over it. Help!
A: Grassy vibes mean you chickened out mid-roast. Push past the first crack by at least 1 minute, and let beans rest 24 hours post-roast. Still green? If your heat’s too low, crank it 15°F next time.
Why did my 1lb of greens become a sad little pile?
A: Roasting is a weight-loss program nobody signed up for. Beans shed 15–20% as moisture bails. Buy extra, need 12oz roasted? Start with 14oz greens. Simple math, significant savings.
Can I roast in my freezing garage?
A: Sure, if you’re into challenges. Cold air fights your heat; preheat 25°F hotter than usual. Block wind with a cardboard shield, and expect roast times to drag. Pro move: Use a heat gun to warm your roaster pre-charge.
My dark roast tastes like campfire ashes. What gives?
A: You overshot the second crack’s finish line. Ease off the gas as oils appear; drop beans 30 seconds sooner next time. And no, blowing on them won’t stop the roast. Cool, fast, learn faster.
Does Denver’s altitude screw up my roasts?
A: High altitude = lower boiling points = slower heat transfer. Add 1–2 minutes to roast times if you’re above 5,000 feet. Humid? For the stretch drying time, the beans are sponges in muggy air. Dry climate? Charge hotter to combat rapid moisture loss.
Worried about freshness?
Worried about freshness? Learn how long coffee pods last and whether to drink expired coffee.
Conclusion
That first sip of coffee you roasted? It’s not just caffeine; it’s alchemy you conjured from raw beans.
Each crack of the roast, each whiff of caramelizing sugars, writes your signature into the cup. This isn’t a hobby; it’s a rebellion against mediocre, mass-produced brews.
You’ll burn batches. You’ll curse uneven roasts. But you’ll taste a vibrant coffee one day, so you’ll rewrite your mornings.
Maybe it’s a honey-processed Honduran you teased to medium perfection. Or a bold Sumatran that dances on the edge of the dark.
Whether skillet or shiny roaster, the tools don’t matter; your hands shape heat. Your patience is learning when to push and when to pause.
Your courage to blend a wild Ethiopian with a stoic Brazilian.
So grab those greens. Ignite the heat. Let the smoke cling to your clothes like a badge of honour.
Your perfect cup isn’t out there; it’s in your kitchen, waiting to be born.


